
How Artificial Grass Is Installed: A Step-by-Step Guide
The full artificial grass installation process, from removing the old lawn to sub-base, drainage, edging, seams and finishing.
Most of what makes an artificial lawn look good and last happens underneath it. The grass itself is only the final layer. A good installation is mainly excavation, a compacted base, drainage and careful finishing, and when those are rushed the problems show up as ripples, puddles, lifting edges and visible seams.
This guide walks through artificial grass installation in the order the work is done. It covers artificial grass removal and ground preparation, the sub-base, drainage, edging, laying and jointing, infill and brushing, and the differences when the grass goes over a patio or a slope. It also explains pile heights such as 30mm, 35mm and 40mm.
Removing the old surface and preparing the ground
The first job is artificial grass removal or lawn removal, depending on what is there. Existing turf, weeds and topsoil are dug out to the depth needed for the new layers, which is usually enough to allow a sub-base and the grass to finish level with surrounding paths and borders. The waste has to be taken away, so access for a skip or a grab lorry matters.
Ground preparation also means checking for hazards and problems: tree roots, soft spots, old drains and areas where water collects. Perennial weeds are dealt with at this stage, because they can push up through the layers later. Any soft or unstable ground is dug out and replaced with proper fill.
Building the sub-base
The artificial grass sub-base is what stops the lawn from sinking, rippling or holding water. It usually consists of a layer of compacted permeable aggregate laid in stages and compacted with a plate compactor, with a fall built in so rainwater runs away rather than ponding. How thick the layer needs to be depends on the ground and how the area will be used.
On top of the compacted aggregate goes a thinner blinding layer of fine material, such as sharp sand or stone dust. This is raked and compacted to a smooth, firm and level surface, because any bump or dip in the base will show through the grass. Getting this finish right is slow, careful work and is the most important step for a flat, even result.
- Dig out to the correct depth and compact the exposed ground.
- Lay permeable aggregate in layers, compacting each one.
- Add a fine blinding layer and compact it to a smooth, firm finish.
- Build in a gentle fall so water can drain away.
Drainage and the weed membrane
Artificial grass drainage installation relies on the backing being perforated and the base being permeable, so rain passes straight through to the ground below. If the soil underneath is heavy or slow to drain, extra measures such as a deeper base or a connection to a drainage point may be needed. Water that cannot escape is a common cause of smells and soggy ground.
A geotextile weed membrane is normally laid over the blinding layer. It keeps the stone and soil separate and limits weed growth from below, while still letting water through. It should overlap at the joints and be trimmed neatly at the edges.
Edging and containing the lawn
Artificial grass edging holds the base in place and gives the lawn a clean outline. Options include timber, concrete, plastic or metal edging, or an existing kerb, paving or wall. Whatever is used must be firmly fixed, because a lawn with weak edges slowly creeps and lifts.
The edging should sit so that the finished grass is level with, or fractionally above, the surrounding surface, which makes mowing a neighbouring lawn or sweeping a path much easier. This is also where the curved areas of a design are formed, so careful setting out saves trimming problems later.
Rolling out, nap direction, seams and fixing
The grass is rolled out and left to settle for a while, so any creases relax. The pile leans in one direction, known as the nap, and every piece should lie the same way, otherwise the colour and sheen will look different from different angles. Pieces are trimmed to fit with a sharp blade, cutting from the back along a stitch line for tidy edges.
Where two pieces meet, a seam is made with jointing tape and adhesive, pressing the backing firmly down so the join is almost invisible. Edges are then secured with galvanised nails or pins at close spacing into the edging or base. Careless seams, with fibres trapped in the glue or gaps between pieces, are one of the most visible signs of a poor job.
- Lay all pieces with the nap running the same way.
- Join pieces with jointing tape and adhesive, keeping fibres free of glue.
- Fix the perimeter securely with nails or pins.
- Trim neatly to edges, curves and obstacles.
Infill, brushing and finishing
Some products use a kiln-dried sand infill, spread over the surface to weigh the grass down and support the fibres, while others are designed to be used with little or none. Whether infill is used depends on the product, the pile and how the lawn will be used. After spreading, the grass is power-brushed against the nap so the fibres stand up and the lawn looks full.
Pile height matters. Shorter piles, around 20mm to 25mm, suit lightly used areas and neat, formal looks. Medium heights such as 30mm, 35mm and 40mm give a fuller, more natural look and are the usual choice for family gardens. Taller piles, up to 45mm, look luxurious, although they can show flattening more and need more regular brushing. A luxury artificial lawn is about density and fibre quality as much as height.
Patios, hard surfaces and slopes
Laying artificial grass over a patio or concrete is different from laying it on soil. The surface must be sound, clean and drain properly, and the grass is either bonded down with adhesive or laid over a shockpad. Because water cannot soak through, the existing falls and drainage need checking first.
Sloping ground needs extra care. The base must be compacted in stages so it does not slide, the edges need strong restraint, and steeper areas may need additional fixing. If you want us to look at a slope or an awkward site, we offer a free site visit.
Common questions
How long does an artificial lawn installation take?
It depends on the size, the access and the ground, but most of the time goes on the excavation and base rather than rolling out the grass. A small garden is often done in a few days, and larger or awkward sites take longer.
Do I need a sub-base, or can grass go straight onto soil?
A proper sub-base is strongly recommended. Grass laid straight onto soil tends to ripple, sink and hold water, and weeds can push up through it.
Will the seams show?
Done well, they should be very hard to see, especially when the nap runs the same way across all pieces. Poorly made seams, with gaps or glue on the fibres, are visible and can come apart.
Keep reading
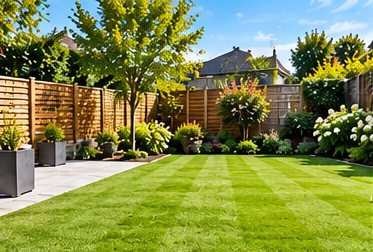
Natural Turf or Artificial Grass: Which Is Right for You?
An honest comparison of natural turf and artificial grass, covering upkeep, drainage, heat, pets, lifespan and when a mix works better.
Read the guide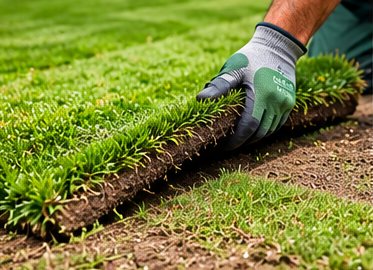
Dog and Child Friendly Lawns and Artificial Grass Guide
What to look for in pet and child friendly lawns, from drainage and backing to odour, shockpad, edging and hard-wearing turf.
Read the guide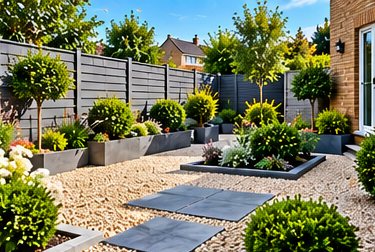
Garden Drainage Solutions: Soakaways, Drains and Channels
Surface water causes, channels, French drains, soakaways and permeable paving, and where water should go.
Read the guidePlanning turfing & lawns?
Send a few details and we will arrange a free site visit. Photos on WhatsApp help us understand the job before we visit.
Get a free quote
Tell us a little about the job and we will come back to you shortly.