
How a New Driveway Is Built: A Clear Step-by-Step Guide
The full build sequence for a new driveway, from site assessment through sub-base to finishing.
A good driveway is mostly invisible work. The surface is what you see, but the levels, excavation, sub-base, edging and drainage underneath decide whether it stays flat for many years or starts sinking after the first winter. Understanding the sequence helps you judge a quote and spot a rushed job.
Here is how a typical driveway design and construction runs, in the order it happens. The details change with the surface you choose and the ground you are working on, but the logic is the same for block paving, resin, tarmac and gravel systems.
Site assessment, levels and falls
Everything starts with a site visit. We look at the existing levels, how the ground slopes, where the water currently goes, the position of the house damp-proof course, drain covers, trees and the access from the road. The finished surface normally needs to sit below the damp-proof course of the house, with a fall running away from the building.
It also helps to agree the finished layout at this stage: where the edges will fall, how wide the entrance will be, whether the drive needs steps or a ramp to meet the house, and which areas must stay accessible, such as manhole covers. Settling these on site, with pegs and lines, avoids awkward compromises once the digging has begun.
Falls are set out with string lines and levels before any digging. A gentle, consistent slope lets water leave the surface without ponding, and it is far easier to plan it now than to correct it later.
Excavation and checking the ground
The old surface and topsoil are dug out to a depth that allows for the full build-up: sub-base, bedding layer and surface. That depth depends on the surface and on whether cars or heavier vehicles will use it. Waste is removed from site.
Once at formation level, the exposed ground is checked. Soft spots, buried rubble and roots may need extra excavation and replacement with compactable material. Services such as pipes and cables are located first, and any drain covers that must stay accessible are noted.
- Dig to the full depth of sub-base, bedding and surface.
- Remove soft spots, roots and buried rubble and replace with compactable material.
- Locate pipes and cables before using machines.
- Remove waste responsibly and keep the site tidy.
Sub-base and geotextile
The sub-base is the structural layer. It is normally a Type 1 style crushed stone aggregate, spread in layers and compacted with a plate compactor or roller. Compacting in layers matters: one deep layer only compresses on top, leaving soft material underneath that settles later.
A geotextile membrane is often laid on the dug-out ground before the stone goes in, especially over softer or clay-type soils. It separates the ground from the stone so the aggregate does not sink into the soil over time, and it helps spread loads.
- Spread stone in layers rather than one thick lift.
- Compact each layer thoroughly before adding the next.
- Check levels and falls again before moving on.
- Use geotextile where the ground is soft or likely to mix with the stone.
Edge restraints, kerbing and steps
Driveway edging and driveway kerbing hold the surface in. Without a firm edge, block paving spreads and loose surfaces migrate. Edge restraints are usually concrete-haunched kerbs, setts or edging units bedded on concrete, set to line and level before the surface is laid.
If your drive meets a sloping garden, a raised path or the front door, driveway steps may be needed. Their risers and treads are set out at the same time as the edging so everything lines up. The driveway entrance construction, where the surface meets the pavement or road, also needs a firm edge and clean transition. Where a dropped kerb applies, the highway authority controls that part.
Drainage: channels and soakaways
Drainage is installed before the surface goes down, because digging it later means lifting finished work. A channel drain is commonly fitted across the lowest point or at the entrance to catch water running off the surface. It must connect to somewhere suitable, which might be a soakaway in the garden where the ground can absorb water, or another approved outlet.
Soakaways rely on the ground being able to take water, so they are not an automatic solution on every plot. Where the surface itself is permeable, the stone sub-base can act as the storage, and the design is different again. Check with your local council if you are unsure what is acceptable for your property.
Bedding, laying, cutting and compaction
For block paving, a bedding layer of sharp sand or fine stone is screeded to an even thickness over the compacted sub-base. The blocks are then laid to the chosen pattern, working from a straight line. Cuts around drains, curves and edges are made with a block splitter or saw, aiming for pieces that are not too small.
Cutting is where a neat finish is won or lost. Small slivers of block look poor and tend to work loose, so the layout is planned so that cuts are reasonably sized and sit at edges and around covers rather than in the middle of the field.
Once the field of blocks is laid, it is compacted with a plate compactor, which settles the blocks into the bedding layer and brings them to a uniform level. Resin and tarmac surfaces follow different laying methods, but they too depend on the same compacted base and clean edges. Weather matters for those: resin and tarmac need dry conditions to go down properly, so a sensible contractor will rearrange the day rather than lay into rain.
Jointing sand and finishing
Block paving is finished by brushing kiln-dried jointing sand into the joints, compacting again and topping up until the joints are full. The sand locks the blocks together and is a big part of how the surface carries weight. Surplus sand is swept off, and a few weeks of use will usually mean one more top-up.
A new driveway installation finishes with tidying: levelling soil against the edges, making good adjacent lawn or borders and clearing waste. If you are planning driveway renovations or a driveway replacement over an old one, the same sequence applies, because the existing surface and base are normally removed rather than built over. We offer a free site visit and quote to look at what your plot needs.
Common questions
How long does a new driveway take to build?
It depends on size, access, weather and the surface chosen, so any number given without seeing the site would be a guess. After a site visit we can give you a realistic timetable for your driveway.
Can a new driveway be laid over the old one?
Occasionally an existing base can be reused if it is sound, level and well drained, but most replacements involve digging out and rebuilding. Hidden weaknesses in the old base are the usual cause of problems on the new surface.
Why does the sub-base matter so much?
It carries the weight of vehicles and spreads it into the ground. A thin or poorly compacted sub-base is the most common reason a driveway sinks or cracks.
Keep reading
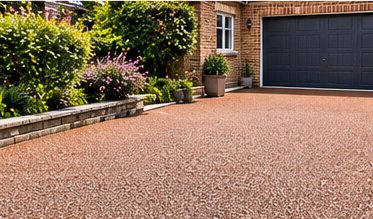
Block Paving or Resin Driveway: Which Is Right for You?
Block paving, resin bound and resin bonded compared on looks, drainage, upkeep and repairability.
Read the guide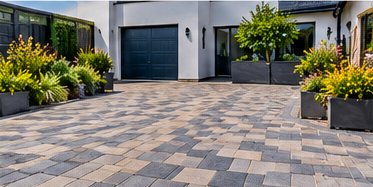
Sunken Block Paving: Causes, Repairs and Aftercare
Why block paving sinks, how repairs are done, and when to replace instead of patching.
Read the guide
Garden Drainage Solutions: Soakaways, Drains and Channels
Surface water causes, channels, French drains, soakaways and permeable paving, and where water should go.
Read the guidePlanning driveways?
Send a few details and we will arrange a free site visit. Photos on WhatsApp help us understand the job before we visit.
Get a free quote
Tell us a little about the job and we will come back to you shortly.