
How a Patio Is Laid: New Patio Construction Step by Step
A step-by-step walk through new patio construction, from set-out to jointing, plus paths and extensions.
Patio installation looks quick from the outside, but most of the work is hidden beneath the finished surface. Knowing the sequence helps you judge quotes, plan around the disruption and spot shortcuts that lead to problems later.
This guide follows a typical garden patio paving job from first sketch to final clean-up, with notes on patterns, jointing choices, paths, stepping stones and patio extensions.
Design and set-out
Start with how the space will be used. An outdoor dining patio needs room for a table, chairs pulled back and people to walk round. Garden seating areas can be smaller, but should still sit in a spot with sun or shelter you will actually enjoy. Small garden patios and courtyard paving benefit from larger slabs and few pattern changes, whereas large garden patios can take curves, borders and mixed materials.
Set-out means marking the outline with pegs and string or paint, checking that the shape suits the paving size to reduce cutting, and planning where water will run. Access for machinery and materials is checked at this stage.
It helps to mark out the proposed shape and put the furniture in place, even temporarily, before anything is dug. Many people find the patio they planned is slightly too small once chairs are pulled out. Think too about the view from the house, the route to the shed or washing line, and whether the sun will reach the space at the times you will use it. Any services, such as pipes, cables and drains, are identified before digging starts. If the plot is awkward to reach, for example through a narrow side passage, tell your installer early, because hand-carrying materials and spoil changes the way the job is planned.
Levels, excavation and sub-base
Levels are fixed from the house, damp-proof course and any existing features, and the fall is built in from the beginning. Excavation removes turf and soft ground to the depth needed for the sub-base, bedding and paving thickness, and waste is taken away.
The sub-base of compacted hardcore or MOT type 1 is built in layers and compacted. Edge restraints go in once the base is firm. This stage is not glamorous, but it decides how well everything lasts, as explained in our article on patio drainage, levels and foundations.
- Mark the outline and check clearances to walls, doors and drains.
- Excavate to formation level and remove spoil.
- Compact the sub-base in layers.
- Set edge restraints to the planned fall.
Bedding and laying
Slabs are normally laid on a mortar bed, with full coverage so the whole slab is supported. Each slab is tapped down to line and level, checked with a spirit level, and adjusted before the mortar sets. Back-priming or slurry is used on dense materials such as porcelain, and natural stone is often treated similarly for a reliable bond.
Laying a pattern is planned in advance. Random patterns mix several slab sizes, coursed patterns use rows of consistent width, large format layouts use fewer, bigger pieces, and crazy paving uses irregular pieces. Cutting follows the pattern, and cuts are best placed at edges, where they are least visible.
Patterns change how the finished patio feels. A random mix of sizes suits informal gardens and hides small differences in slab size, coursed rows look tidy and emphasise direction, large format layouts feel calm and modern but leave less room for error, and crazy paving suits relaxed, cottage-style spaces but takes the most cutting. Whatever you choose, a dry lay of the first few slabs helps check that joint widths and alignment work before mortar goes down.
Jointing choices
Joints are filled after the slabs have set. Each method has trade-offs, and the right one depends on the paving and the site.
Joint fill also affects upkeep: poorly filled joints let weeds, ants and moisture in, and over-wet mixes can stain the face of paving. There is no single answer. Sand suits people who want repairability, mortar suits traditional stone, and resin-based products suit those who want fewer weeds, provided the base is stable. A joint that is too hard and rigid on a base that moves will simply crack, so the jointing should match the quality of the groundwork.
- Sand: easy to repair, but can wash out and allow weeds.
- Mortar pointing: a traditional finish and strong when done well, but needs careful application so it does not smear and can crack if the base moves.
- Resin-bound or polymer jointing compounds: resist weeds and washout, though they need dry weather and good prep.
- Slurry or grout: a flowable mix brushed into joints, common with porcelain; it must be cleaned off before it hardens.
Edging, clean-up and curing
Edging is completed to tie in with lawn, borders or walls, and haunching is allowed to cure. Surplus mortar, slurry and dust are brushed and washed off, and the area is checked for rocking slabs or missed joints.
The patio should be kept free of heavy loads until the bedding and jointing have cured, and the time needed depends on materials and weather. Furniture and barbecues should wait until you are told it is ready.
Finally, any leftover materials are cleared and waste is taken away. It is worth walking over the finished work with the installer, checking the falls with a little water if you can, and asking about aftercare, such as when it is safe to wash and seal the surface. Expect minor changes in colour as the jointing dries and as the surface weathers, and keep a few spare slabs from the delivery in case a repair is needed in future.
Paths, stepping stones and extensions
Garden path installation follows the same logic on a smaller scale: a firm base, correct falls and edges that stop spreading. Stepping stone paths through lawn need individual bases and should sit slightly below mower height. Patio extensions need the new base to join the old one properly, and levels and materials should match. New slabs rarely match weathered ones exactly, so a border or a change of pattern can make a deliberate feature of the join. Paths also need a width that suits their job: enough for two people or a wheelbarrow on main routes, and narrower for decorative walks, with a slight fall to shed water and edges set so that the grass can be mown cleanly.
We handle groundwork, drainage, laying and finishing ourselves, and cover Worcester and surrounding Worcestershire towns. A free site visit lets us measure up and talk through access and patterns.
Common questions
How long does it take to lay a patio?
It depends on the size, access, ground conditions and materials. Excavation and sub-base preparation usually take longer than the laying itself, and curing time is needed before heavy use.
Which pattern suits a small patio?
Simple layouts with larger slabs or a single size generally make a small space feel calmer and less cluttered. Mixed random patterns can work, but they need careful planning to avoid looking busy.
Do I need to be at home while the work is done?
Not usually, though you will need to agree access, site layout and decisions about levels and drainage beforehand. It helps to be reachable for questions about details such as cuts and edges.
Keep reading
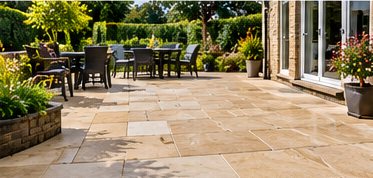
Porcelain or Natural Stone Patio: Which Should You Choose?
How porcelain, Indian sandstone and other natural stone compare for looks, grip, staining, laying and ageing.
Read the guide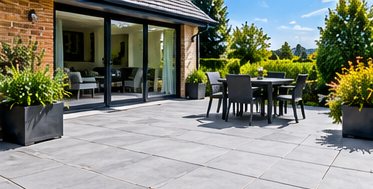
Patio Drainage, Levels and Foundations Explained Simply
Why falls, sub-base and drainage decide whether a patio lasts, plus notes on raised patios, retaining walls and steps.
Read the guide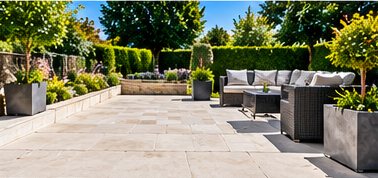
Cleaning, Sealing and Repointing a Patio: A Practical Guide
How to clean, seal, repoint and repair a patio, and when relaying or replacement makes more sense.
Read the guidePlanning patios & pathways?
Send a few details and we will arrange a free site visit. Photos on WhatsApp help us understand the job before we visit.
Get a free quote
Tell us a little about the job and we will come back to you shortly.