
Overgrown Garden Clearance: How the Job Is Done Step by Step
A practical walk-through of how a neglected, overgrown garden is assessed, cleared, sorted and left ready for its next stage.
A garden that has been left for a few seasons can look impossible. Brambles arch over the lawn, self-seeded saplings lean on the fence, and somewhere underneath there may be a path, a shed or a border you had forgotten about. The good news is that neglected garden clearance follows a fairly predictable order, and knowing that order helps you judge a quote and plan what happens afterwards.
This guide explains how heavy vegetation clearance is normally approached, what gets checked before any cutting starts, what to decide about keeping and removing, and what the finished ground should look like. Every garden is different, so treat it as a framework rather than a fixed script.
Start with an assessment, not a strimmer
The first job is a walk around the whole plot, ideally with you present. You are looking at how dense the growth is, how far it reaches, where the boundaries really are, what access there is for people and machines, and how much waste will come out. Garden jungle clearance is mostly a logistics problem: the cutting is quick compared with moving and disposing of what you have cut.
This is also the moment to say what the garden is for. If you want a clean slate for a new lawn or patio, the approach differs from a garden where you want to rescue a few shrubs. A free site visit lets us see the plot first and talk through the options before anything is agreed.
Hazards to check before work begins
Dense undergrowth hides things. A careful look, and often a slow first pass by hand, avoids damage and injury. Overgrown gardens commonly contain the following.
- Wasp, hornet or bee nests in banks, sheds, hedges and thick ivy. If you see regular insect traffic, tell us so the nest can be dealt with properly first.
- Sharps and hidden rubbish such as glass, wire, broken tools and old fencing.
- Hidden structures including low walls, old foundations, ponds, manhole covers, pipes and cables just under the surface.
- Services and utilities. Overhead lines, drain covers and meter boxes need working around, and anything that looks like a live cable should be reported rather than cut.
- Protected trees. If a tree may have a tree preservation order, or the property is in a conservation area, check with your local council before any tree is cut or removed.
- Japanese knotweed or giant hogweed. Do not cut or strim either. If you suspect them, say so before work starts so they can be handled by a specialist.
Decide what stays
Before the heavy work, mark what you want to keep. A mature tree, a healthy hedge, a well-rooted shrub or an old rose may be worth saving even if it looks scruffy. Many overgrown shrubs respond well to hard pruning, so removal is not always the right answer.
Be realistic about the rest. Anything that is diseased, structurally weak, causing damage or simply not wanted is better removed in this one visit than revisited later. Tell the team about plants with sentimental value, because they are easy to lose in thick growth.
The usual order of work
Clearance tends to follow a sequence that keeps the site safe and the waste manageable. The exact order shifts with the garden, but the logic is consistent.
- Cut back tall growth first so the ground becomes visible and walkable.
- Strim or brushcut the remaining low vegetation and long grass, working in sections.
- Remove brash, meaning the cut branches and stems, as you go, so it does not bury the work area.
- Take out unwanted hedges, shrubs and saplings, cutting them down and dealing with the roots.
- Decide on stumps and roots. Options include grinding the stump below ground level, digging it out, or cutting it low and leaving it to rot, which is slower and not suitable under a patio or lawn.
- Treat weeds and regrowth, either by digging out roots or by applying a suitable weed treatment where appropriate.
- Sort the waste into green waste, soil and stone, timber and general rubbish.
- Rake, grade and level the ground so it is ready for whatever comes next.
Tools, machines and heavy vegetation work
Hand tools such as loppers, saws and forks do the careful work near structures and features you are keeping. Petrol strimmers with brush blades, hedge trimmers and chainsaws handle thick stems and tall growth. Where trunks and large stumps are involved, a stump grinder is usually quicker and neater than digging.
Dense bramble and ivy often need two passes: first to cut and remove the top growth, then to expose and pull the crowns and roots. Machines help, but they depend on access. A narrow side passage or steps to the garden changes how much can be carried by hand and how long it takes, which is worth mentioning at the site visit.
Safety kit matters as much as the machines. Eye protection, gloves, boots, ear defence and chainsaw trousers are standard for this kind of work, and we hold public liability insurance. A tidy site also helps: brash is stacked or chipped regularly, so nobody is working around a growing pile.
Waste disposal and what affects the timescale
Green waste removal, garden rubbish clearance and garden debris clearance should all end with the waste leaving your property and being disposed of responsibly by a registered waste carrier. We take the waste away, and it is sensible to ask any contractor how and where their waste is handled, because householders can be held responsible for fly-tipped waste.
How long the job takes depends on plant density, the size of the plot, the amount of hidden rubbish, access, whether roots and stumps are being removed, and how much waste there is to carry. A small, thin garden can be a single day. A large plot with years of growth and a shed to dismantle may be several.
Weather plays a part too. Very wet ground makes machines difficult to use and turns cleared soil to mud, so some jobs are better scheduled for a drier spell. Ask what happens if the weather interrupts the work, and whether the cleared ground will be left tidy and safe between visits.
Finishing and what comes next
A good finish means bare, level, workable ground with no stray roots or wire left behind. From there you can lay new turf, prepare for a patio or driveway, put up fencing, or plant borders. If you leave cleared soil bare, weeds return quickly, so it helps to have the next stage planned. If you would like someone to look at your plot and talk through the sequence, we offer a free site visit across Worcester and the surrounding Worcestershire towns.
Common questions
Can you clear a garden in one day?
Smaller or lightly overgrown gardens often can be cleared in a day, but dense brambles, large hedges, stumps and lots of waste can take longer. The site visit is where the likely timescale is worked out.
Do I need to be at home while the work is done?
Not usually, provided there is safe access to the garden and everything is agreed beforehand. It helps to be available at the start to point out what should be kept and where any known hazards are.
Will the garden be ready for turf or paving straight after?
Clearance leaves the ground cleared and roughly levelled. Turf, paving or artificial grass normally need further preparation such as proper levelling, compaction and a suitable base, so it is worth planning both stages together.
Keep reading
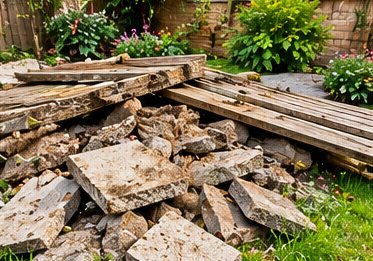
Hedge, Bramble and Ivy Removal: Methods and What to Expect
How leylandii, laurel, bramble, ivy, bamboo and other tough plants are removed, and why roots and regrowth decide how long the job takes.
Read the guide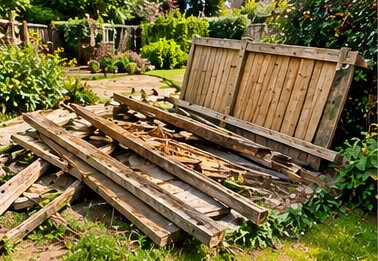
End of Tenancy and Landlord Garden Clearance Explained
What a garden usually needs at the end of a tenancy, and how landlords, agents and owners can plan the work around inspections and sales.
Read the guide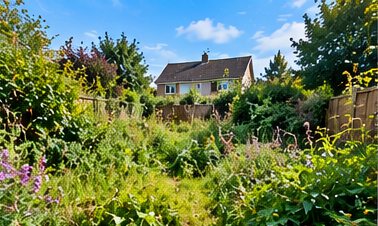
Clearing and Preparing a Garden Before Landscaping Starts
Strip-out, excavation, levelling, drainage and sequencing: the preparation that decides how a new patio, driveway, lawn or fence turns out.
Read the guidePlanning garden clearance?
Send a few details and we will arrange a free site visit. Photos on WhatsApp help us understand the job before we visit.
Get a free quote
Tell us a little about the job and we will come back to you shortly.